TP-Link Tether App for iPhone & iPad (iOS) - Download & Set Up
In today’s connected world, managing your Wi-Fi network has become more crucial than ever. TP-Link, a leader in networking hardware, offers a powerful tool for iPhone and iPad users— the TP-Link Tether app. This easy-to-use app allows users to manage their TP-Link routers, range extenders, and mesh systems with just a few taps on their iOS devices.
Whether you want to optimize your Wi-Fi, configure new devices, or keep your network secure, the TP-Link Tether app is a one-stop solution. In this detailed guide, we will walk you through the process of downloading and installing the TP-Link Tether app on your iPhone or iPad, as well as provide tips on using it effectively.
What is the TP-Link Tether App?
The TP-Link Tether app is an official app developed by TP-Link to provide users with an easy way to manage their TP-Link networking devices. This includes routers, range extenders, and Deco mesh systems. With the TP-Link Tether app, users can:
Set up a new TP-Link device
Change Wi-Fi network settings (SSID, password, etc.)
Monitor and control internet access
Block unauthorized devices
Set up parental controls
View device usage and more
The app is designed to be simple and intuitive, making network management easy for everyone, from tech-savvy users to beginners.
Why Download the TP-Link Tether App for iPhone & iPad?
There are several compelling reasons why you should download the TP-Link Tether app for your iOS devices:
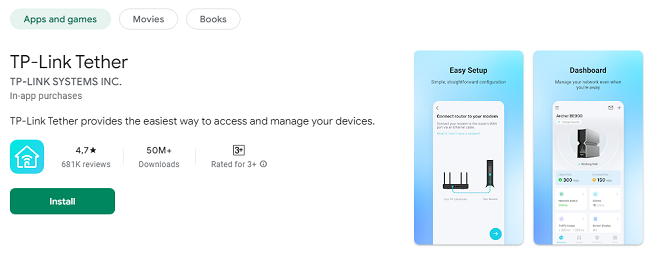
Simple Setup: The app makes it easy to set up your TP-Link device without needing a computer. You can configure your network settings right from your phone or tablet.
Remote Management: The app allows you to manage your TP-Link devices remotely, which means you can monitor your network even when you’re not at home.
User-Friendly Interface: The TP-Link Tether app has an easy-to-navigate interface, ensuring that even those who are not tech experts can manage their network efficiently.
Parental Controls: The app allows you to set up parental controls to ensure that your children are using the internet safely, giving you peace of mind.
Network Security: The app allows you to block unauthorized devices from accessing your network, keeping your home Wi-Fi secure.
Device Insights: It offers detailed insights into your connected devices, helping you monitor data usage and performance.
Download TP-Link Tether App for iPhone & iPad (iOS)
Downloading the TP-Link Tether app for your iPhone or iPad is a straightforward process. Below are the steps to help you get started:
Step 1: Open the App Store
Unlock your iPhone or iPad and locate the App Store icon on your home screen.
Tap the App Store icon to open the app marketplace.
Step 2: Search for TP-Link Tether
Once inside the App Store, tap on the Search tab at the bottom of the screen.
In the search bar at the top of the screen, type TP-Link Tether and press Search.
The official TP-Link Tether app should appear in the search results.
Step 3: Download and Install the App
Next to the TP-Link Tether app, you’ll see an Install button (if you’re not signed in, you may be prompted to enter your Apple ID and password).
Tap the Install button to begin the download and installation process. The app should automatically download to your device.
Step 4: Open the App
Once the installation is complete, tap the Open button that appears, or go back to your home screen, where you should now see the TP-Link Tether app icon. Tap on it to launch the app.
Step 5: Sign In or Register
When you first launch the TP-Link Tether app, you’ll be prompted to either Sign In to your TP-Link account or Register a new account. Having a TP-Link account allows you to remotely manage your devices and access additional features.
If you already have a TP-Link account, simply enter your credentials (username and password).
If you don’t have a TP-Link account, tap Register and follow the on-screen instructions to create one.
Step 6: Add Your TP-Link Device
Once logged in, you can add your TP-Link router, range extender, or Deco mesh system by following these steps:
Tap the + symbol or the Add Device button on the app’s home screen.
The app will guide you through the setup process, which usually involves scanning the QR code on your device or entering the device’s serial number manually.
After adding the device, you can start configuring your network settings and managing your devices.
How to Use the TP-Link Tether App Effectively?
Now that you’ve downloaded and installed the TP-Link Tether app, here are some key features and how to use them effectively:
1. Change Wi-Fi Settings
The app allows you to modify your Wi-Fi settings without having to log into a web portal. You can change:
Wi-Fi SSID (Network Name)
Wi-Fi Password
Security Type (WPA, WPA2, etc.)
To change your Wi-Fi settings, go to the app’s Network Settings section, select your device, and make the desired changes.
2. Monitor Connected Devices
The TP-Link Tether app shows you a list of all devices currently connected to your network. You can view details about each device, including:
Device name
IP address
MAC address
If you see an unknown or unauthorized device, you can easily block it from accessing your network.
3. Set Up Parental Controls
If you want to control when your kids can access the internet, the app allows you to set up Parental Controls. You can:
Set internet usage schedules
Block specific websites or content categories
Pause internet access for specific devices
This feature is helpful for ensuring that children are not spending too much time online or accessing inappropriate content.
4. Device Management
You can manage your TP-Link devices directly from the app. This includes:
Restarting your router
Updating firmware
Troubleshooting device performance
This makes it easier to keep your network in optimal condition without needing to manually reset or troubleshoot your devices.
5. Guest Network Setup
The app also lets you set up a Guest Network for visitors. This feature ensures that guests can connect to the internet without having access to your main network and devices. You can:
Set up a unique SSID for guests
Set a separate password for guest access
Control how long the guest network is active
Troubleshooting Common Issues
While downloading and using the TP-Link Tether app is usually smooth, you might encounter some issues. Here are some common problems and solutions:
1. App Not Downloading
If the TP-Link Tether app won’t download from the App Store, try these solutions:
Ensure that your iPhone or iPad is connected to the internet.
Check if there’s enough free storage space on your device.
Restart your device and try again.
2. Unable to Add a Device
If you’re having trouble adding a TP-Link device, make sure that:
Your TP-Link device is powered on and in pairing mode.
Your iPhone or iPad is connected to the same Wi-Fi network as your TP-Link device.
The QR code or serial number you entered is correct.
3. App Crashing
If the app crashes, try the following:
Close the app and reopen it.
Restart your device.
Check for app updates in the App Store and install the latest version.
4. Wi-Fi Issues
If your Wi-Fi network is not working correctly after setting up your TP-Link device, try rebooting your router or using the app’s Troubleshoot feature to identify the problem.
Conclusion
Downloading and using the TP-Link Tether app on your iPhone or iPad gives you full control over your TP-Link networking devices, enabling you to manage your Wi-Fi network with ease. The app’s intuitive interface, along with features like parental controls, device management, and network optimization, makes it a must-have for anyone using TP-Link routers or extenders.
By following the steps outlined in this guide, you can quickly download and install the TP-Link Tether app on your iOS device and start managing your network remotely. Whether you’re at home or on the go, the TP-Link Tether app offers the flexibility and control you need to maintain a secure and efficient network.
Now that you have all the tools and information needed, download the TP-Link Tether app and start managing your network today!
Updates